A daily stream of life

Daily photos

Long exposures

A few shots from the studio shoot I did with Elise recently. The technique involved using the camera on a tripod, opening the shutter for approximately 2 seconds and varying the balance of ambient/strobe lighting.

I used a Elinchrom RX500 fired through a gridded beauty dish camera right, with a gelled & gridded reflector providing the rim light from behind left. Camera settings ISO 125 @f16. I fired the flash manually a second time with the remote trigger to get the double exposure. The amount of ambient determined the movement flow between the two.

Night at the Museum

Well, a night with Nikon at the Museum of Tropical Queensland. Interesting evening with a talk by pro commercial photographer Michael Cranfield. Great work by Garricks Camera House and Nikon for organising the evening and tomorrow's event. Garricks are actually quite awesome - such a helpful team. I would seriously rather pay more for a local service and to support them, but these guys always hit the right price as well.

This evening Michael told us about his career and some good advice on building a successful photography business. Nikon showcased their camera and lens range and we got to play with them afterwards, including some astrophotography and the ridiculous monster Nikon 400mm f2.8 which will set you back about $13k and I could barely hold for more than a few minutes (pic below).

Some pics below. Tomorrow morning is an early start at 7am for another talk and a walk along the Strand to capture the Strand Ephemera.

Nikon 70-200 f2.8 @200mm f2.8 ISO 125 1/20 tripod

Nikon 70-200 f2.8 @200mm f2.8 ISO 125 1/20 tripod

Nikon 70-200 f2.8 @200mm f2.8 ISO 1250 1/8 tripod

Nikon 70-200 f2.8 @200mm f2.8 ISO 1250 1/8 tripod

Nikon 70-200 f2.8 @200mm f2.8 ISO 125 1/20 tripod

Nikon 70-200 f2.8 @200mm f2.8 ISO 125 1/20 tripod

Michael Cranfield in full flowNikon 85mm f1.4 @f1.4 ISO 800 1/200

Michael Cranfield in full flow
Nikon 85mm f1.4 @f1.4 ISO 800 1/200

Nikon 24-70 f2.8 @f2.8 ISO 2000 1/200

Nikon 24-70 f2.8 @f2.8 ISO 2000 1/200

Nikon 200mm f2.0 VR @f2.0 ISO 3600 1/200 ($2.3k lens)

Nikon 200mm f2.0 VR @f2.0 ISO 3600 1/200 ($2.3k lens)

Nikon 400mm f2.8 @f2.8 ISO 12800 1/400 handheld (lens below)

Nikon 400mm f2.8 @f2.8 ISO 12800 1/400 handheld (lens below)

Nikon 400mm f2.8 FL ED VR

Nikon 400mm f2.8 FL ED VR

Sharing your photos on Facebook

This is a call out to everyone that I give photos to - please take a moment to make sure that when you share our pictures, that the great care and attention that went into them is preserved.

Before the shoot, you spent a while getting your look just right, choosing the outfit, doing your hair & make up. My lighting was arranged to make you look wonderful, I toiled over a computer editing the colours, tones & sharpness (and maybe a zit removal or two) to finalise it and make it look completely awesome.

Please, please take some care when you transfer the pics that I send you on Dropbox to your Facebook feed. Because if you do it wrong, you're going to undo all the great things we just did.

The wrong way

Get the image on your screen, take a screen shot on your iphone 4 and then re-upload to FB.

Top: Saved to computer/phone  |  Bottom: Screenshot & uploaded

Top: Saved to computer/phone  |  Bottom: Screenshot & uploaded

The right way

If possible, do your uploading to Facebook from a computer. I know this isn't always possible or convenient, so I'll run through the steps below to get the best results on your phone. On your computer, use the download link on the Dropbox page and then upload the pics in their mid-resolution glory. Use the 'high resolution' option on Facebook. For the techies, I usually save our pics as .png files rather than .jpg because FB doesn't apply it's own disaster-shrinking techniques to PNG files like it does to run-of-the-mill JPGs. 

If you must do it on your phone, you need to find a way to 'Save' the picture to the phone, not screen shot it. NEVER ever screen shot it...! Unfortunately, it's not always intuitive how to do that, which can be super annoying.

By the way, if you're reading this on your phone and both the pics above look OK, zoom in or check again when you get home. The bottom one looks awful on a computer (which is how more than half of your friends will see it)!

'Save Image' is your friend!

If you're looking at the Dropbox pics from a Messenger or Facebook link, the best way to get access to it, is to choose the square with an upward-facing arrow, and open in Safari. Once you are in Safari viewing the pic, you can tap the screen, hold your finger down and a 'Save Image' option will appear. 'Save Image' is your friend. Always look for 'Save Image'. This will get your beautiful new profile pic onto the Camera Roll and you're home and dry from there. Upload to Facey and all will be good.

'Why don't you just Facebook message it to me from the start?', you might ask. Even pics sent through Messenger are down-scaled in quality, so it will still undo our good work. Instagram is less of an issue, because the standard size is still 640 pixels square, so even a nasty iPhone 3 screen shot will not look too bad. But it will look shocking on FB - and you won't notice it until you're back home on your computer. Then, who wants to throw away all the 'likes' and do a re-upload... :)

Thank you for taking the time to listen to my rant, and for helping us show our work in the best way possible.

DT

Danny TuckerComment
ND Filters in the studio
Nikon 750D | Tamron 24-70 f2.8 Di VC | Elinchrom Ranger | Lastolite Mega Umbrella

Nikon 750D | Tamron 24-70 f2.8 Di VC | Elinchrom Ranger | Lastolite Mega Umbrella

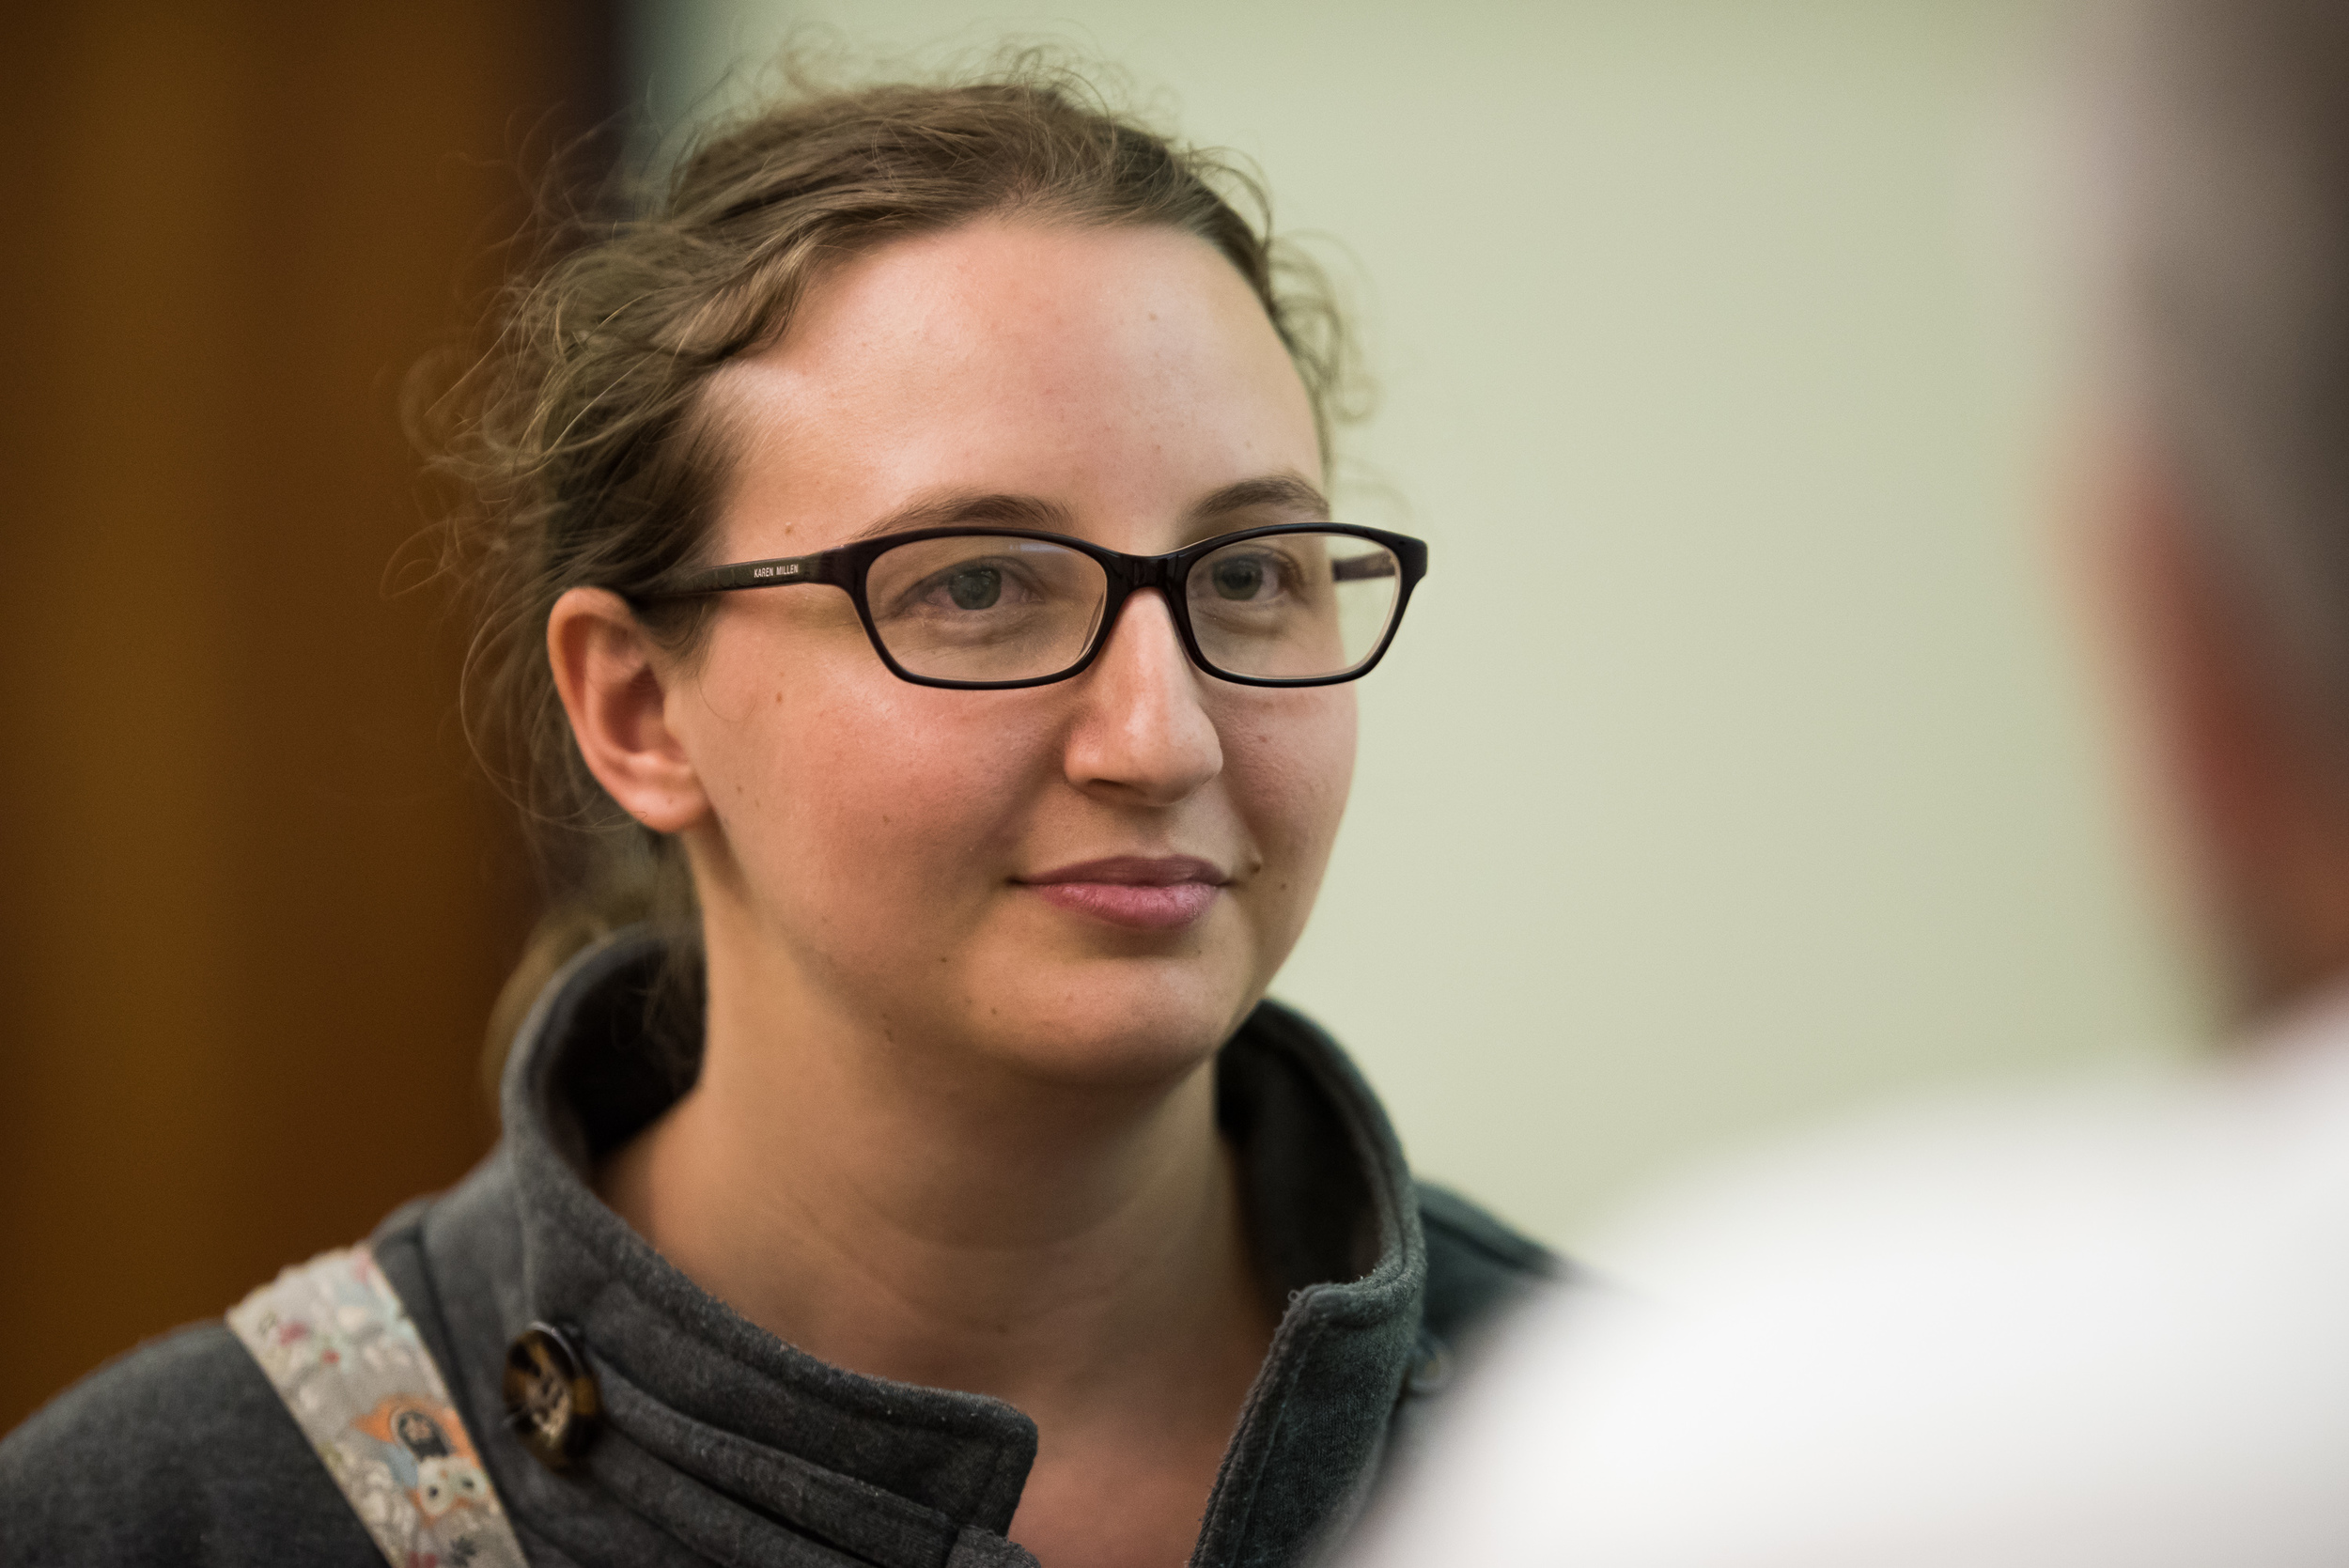
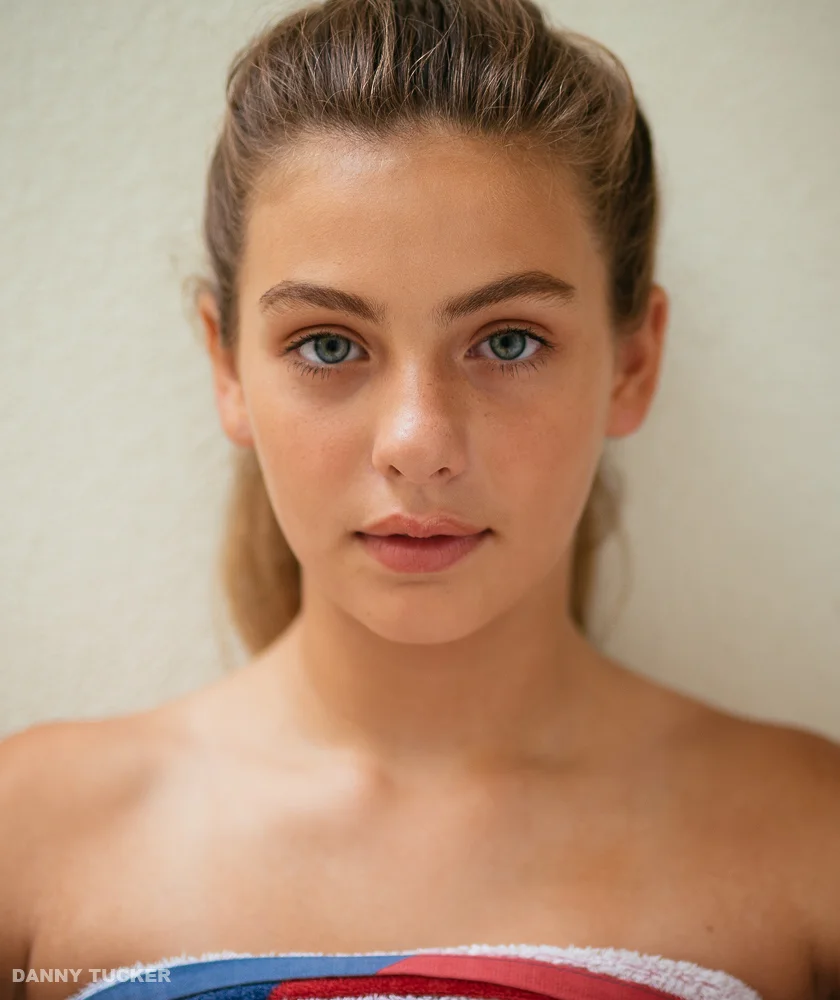
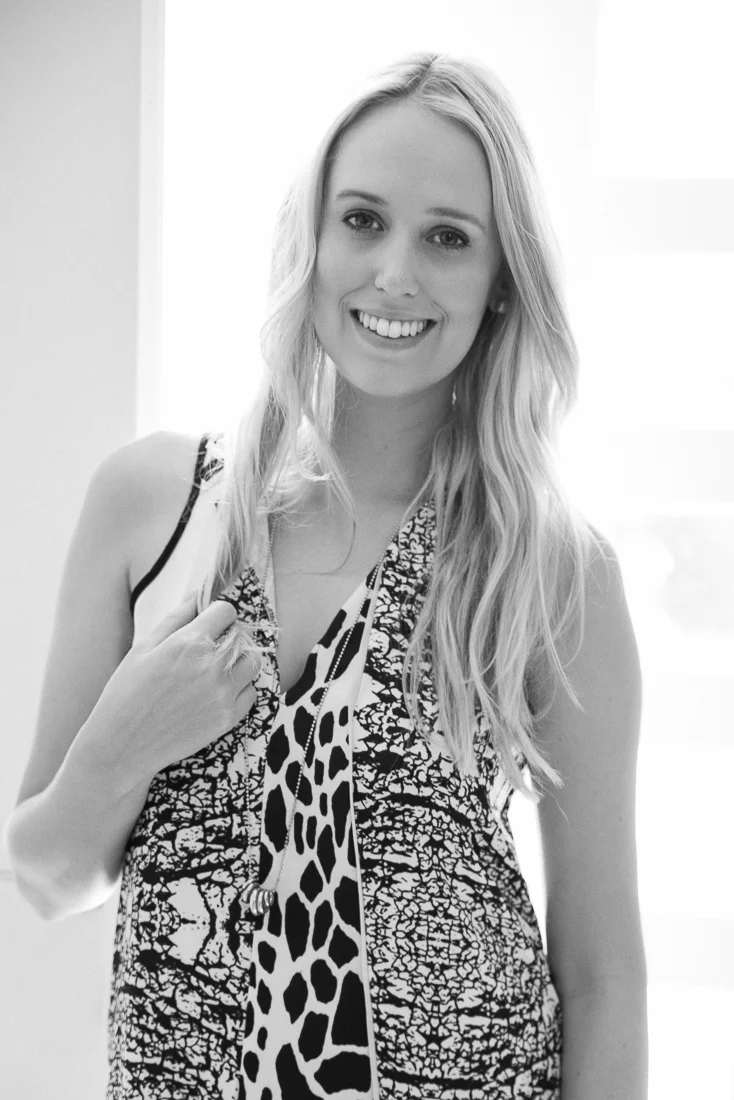
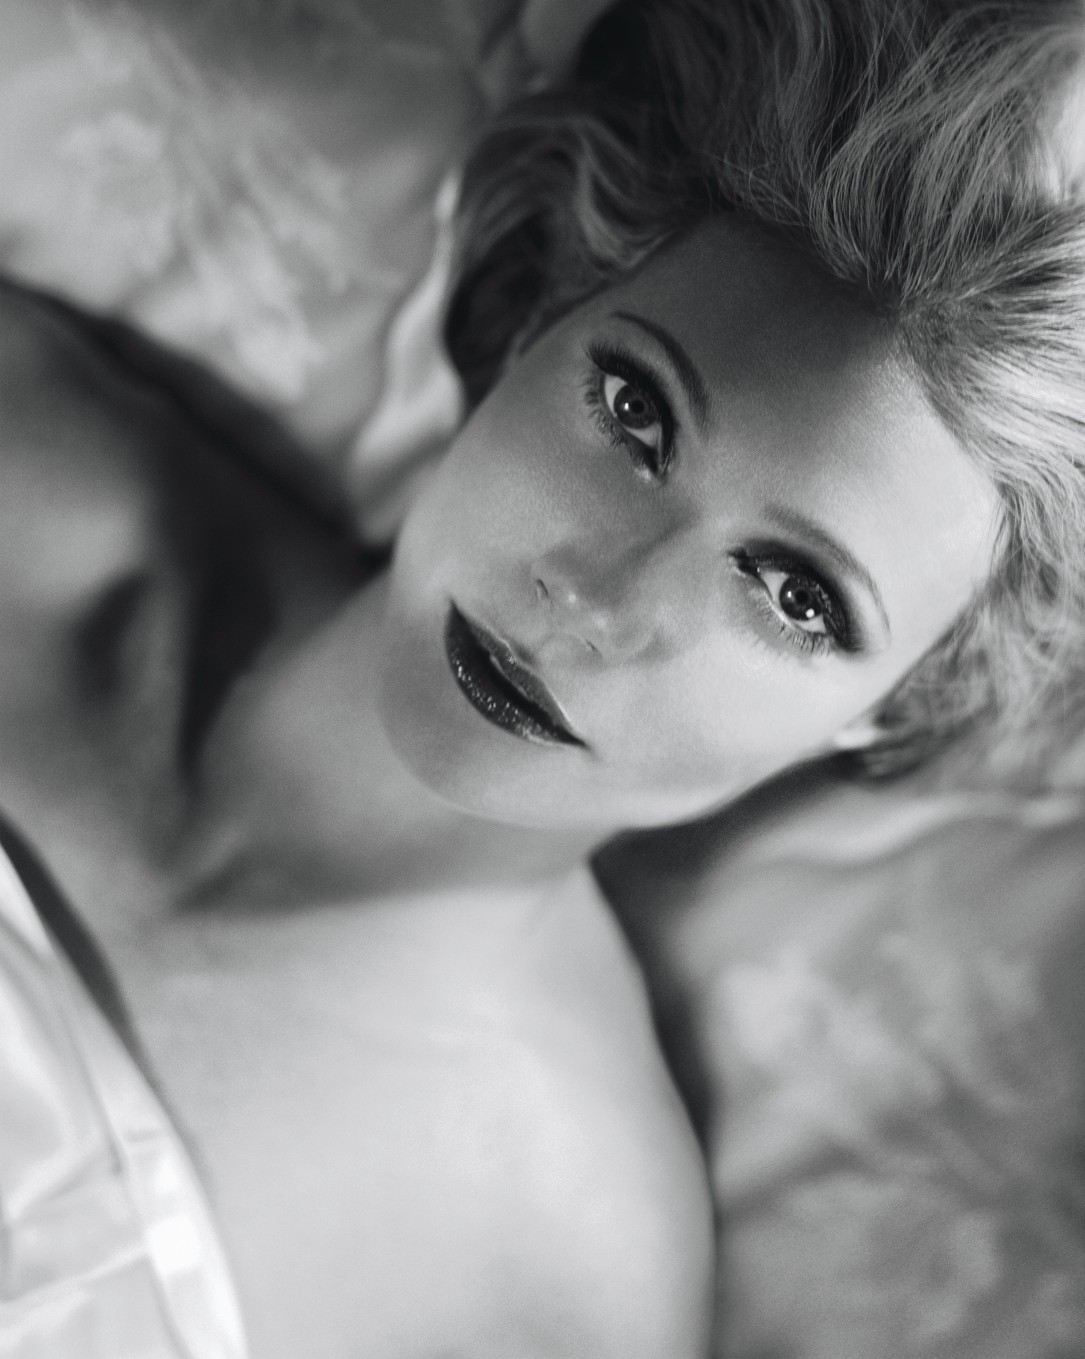
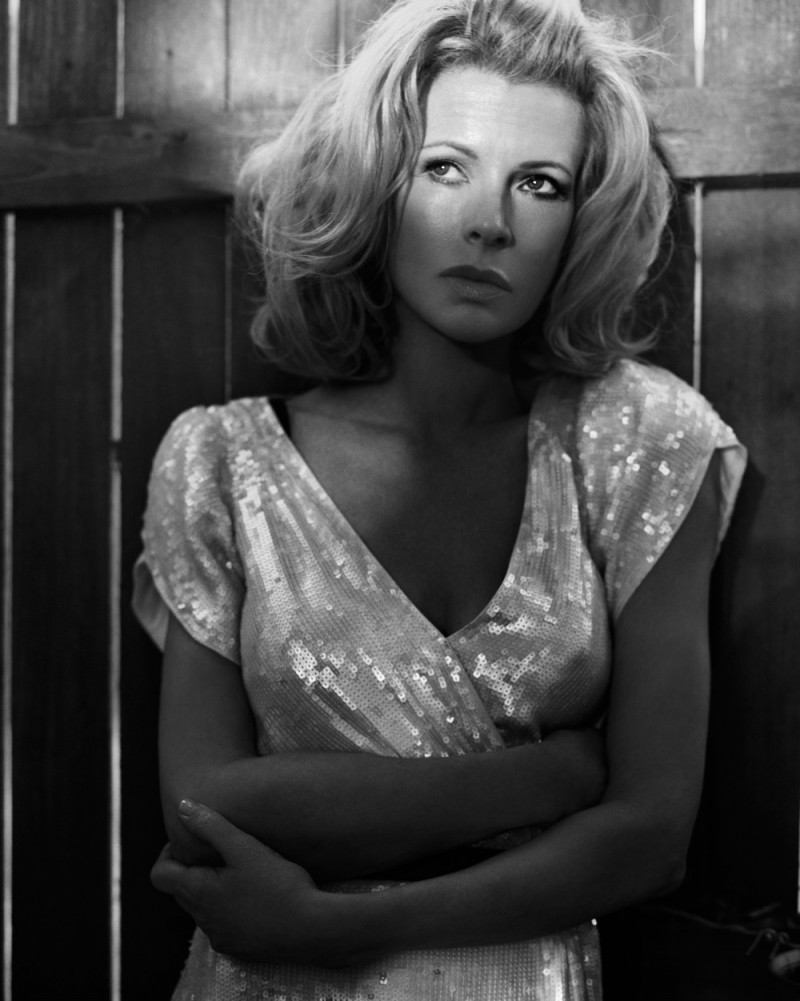
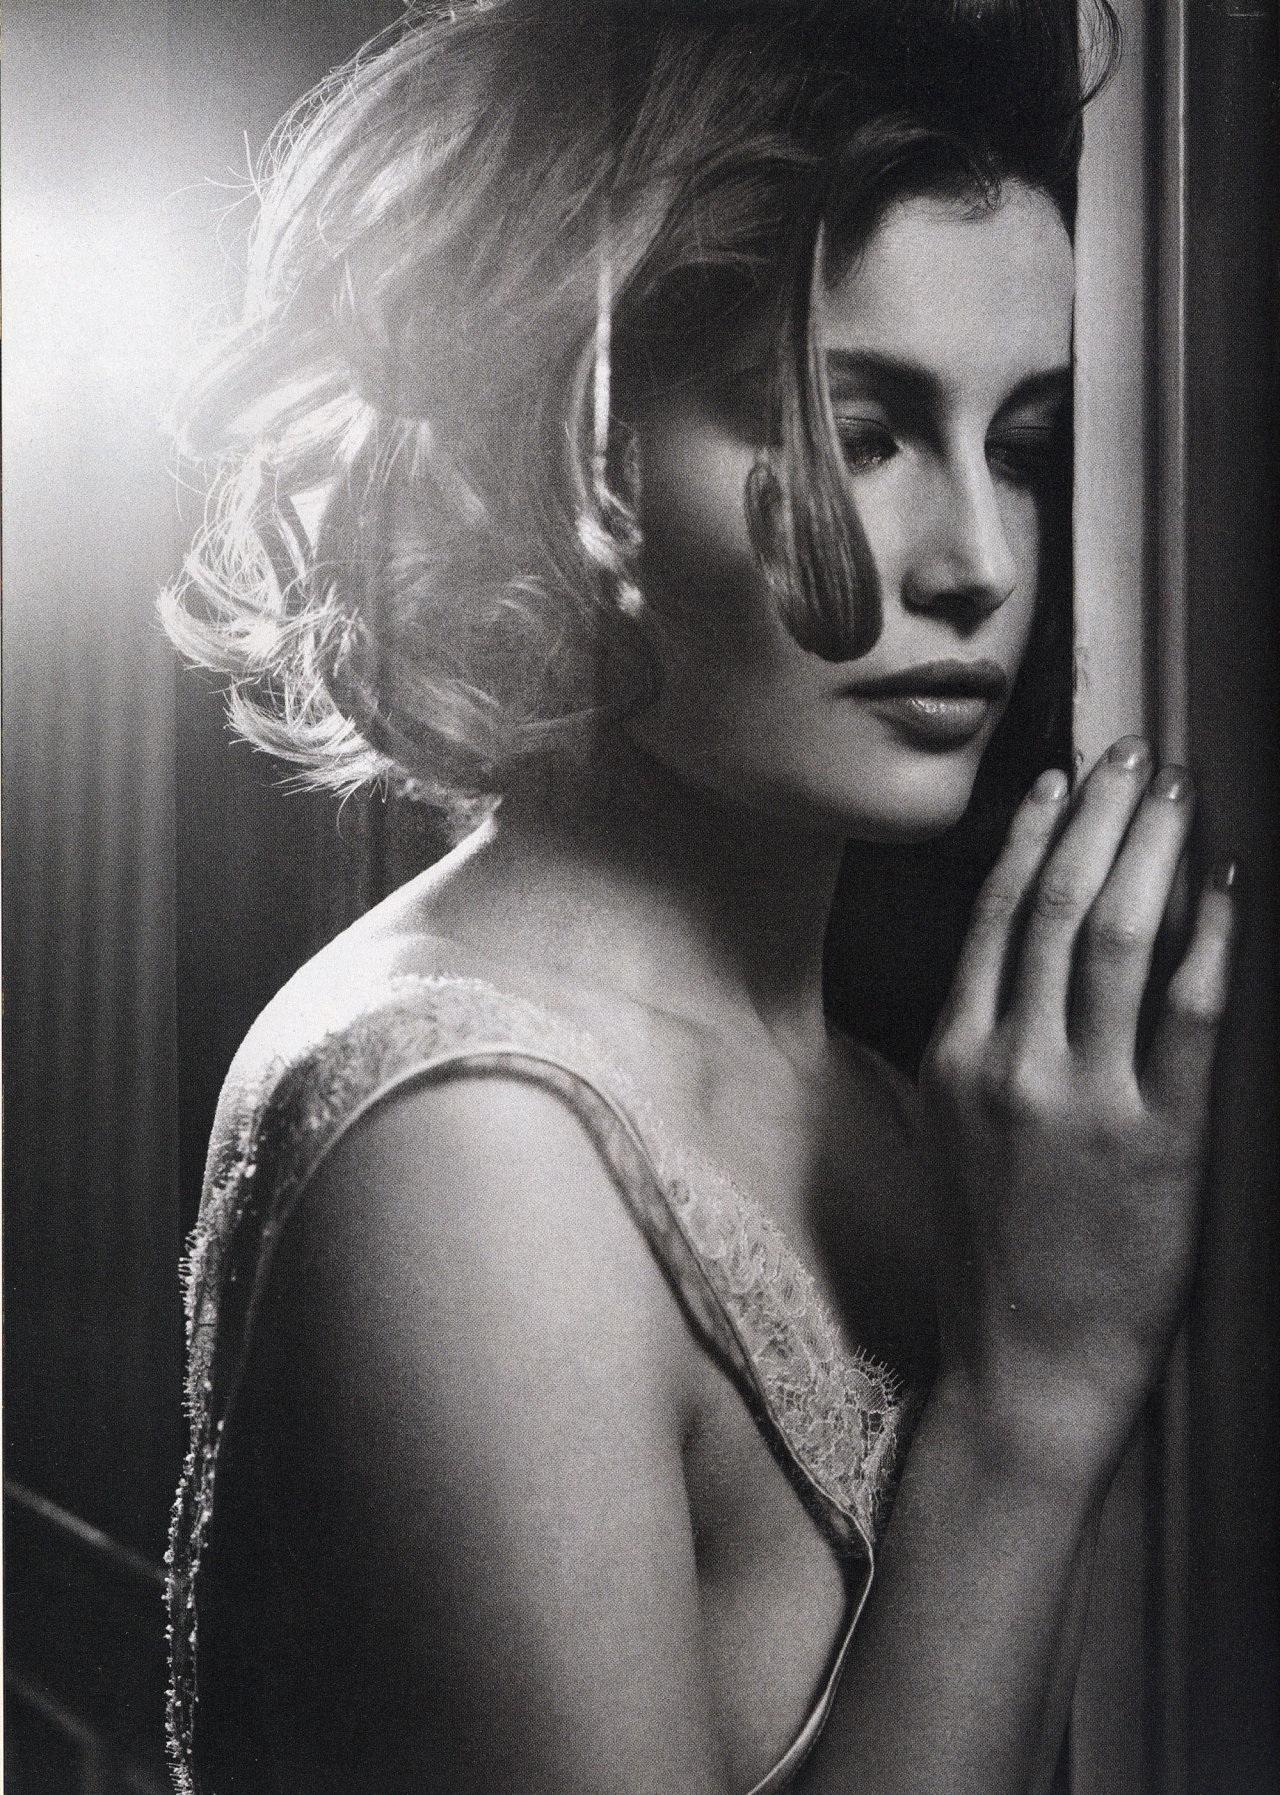
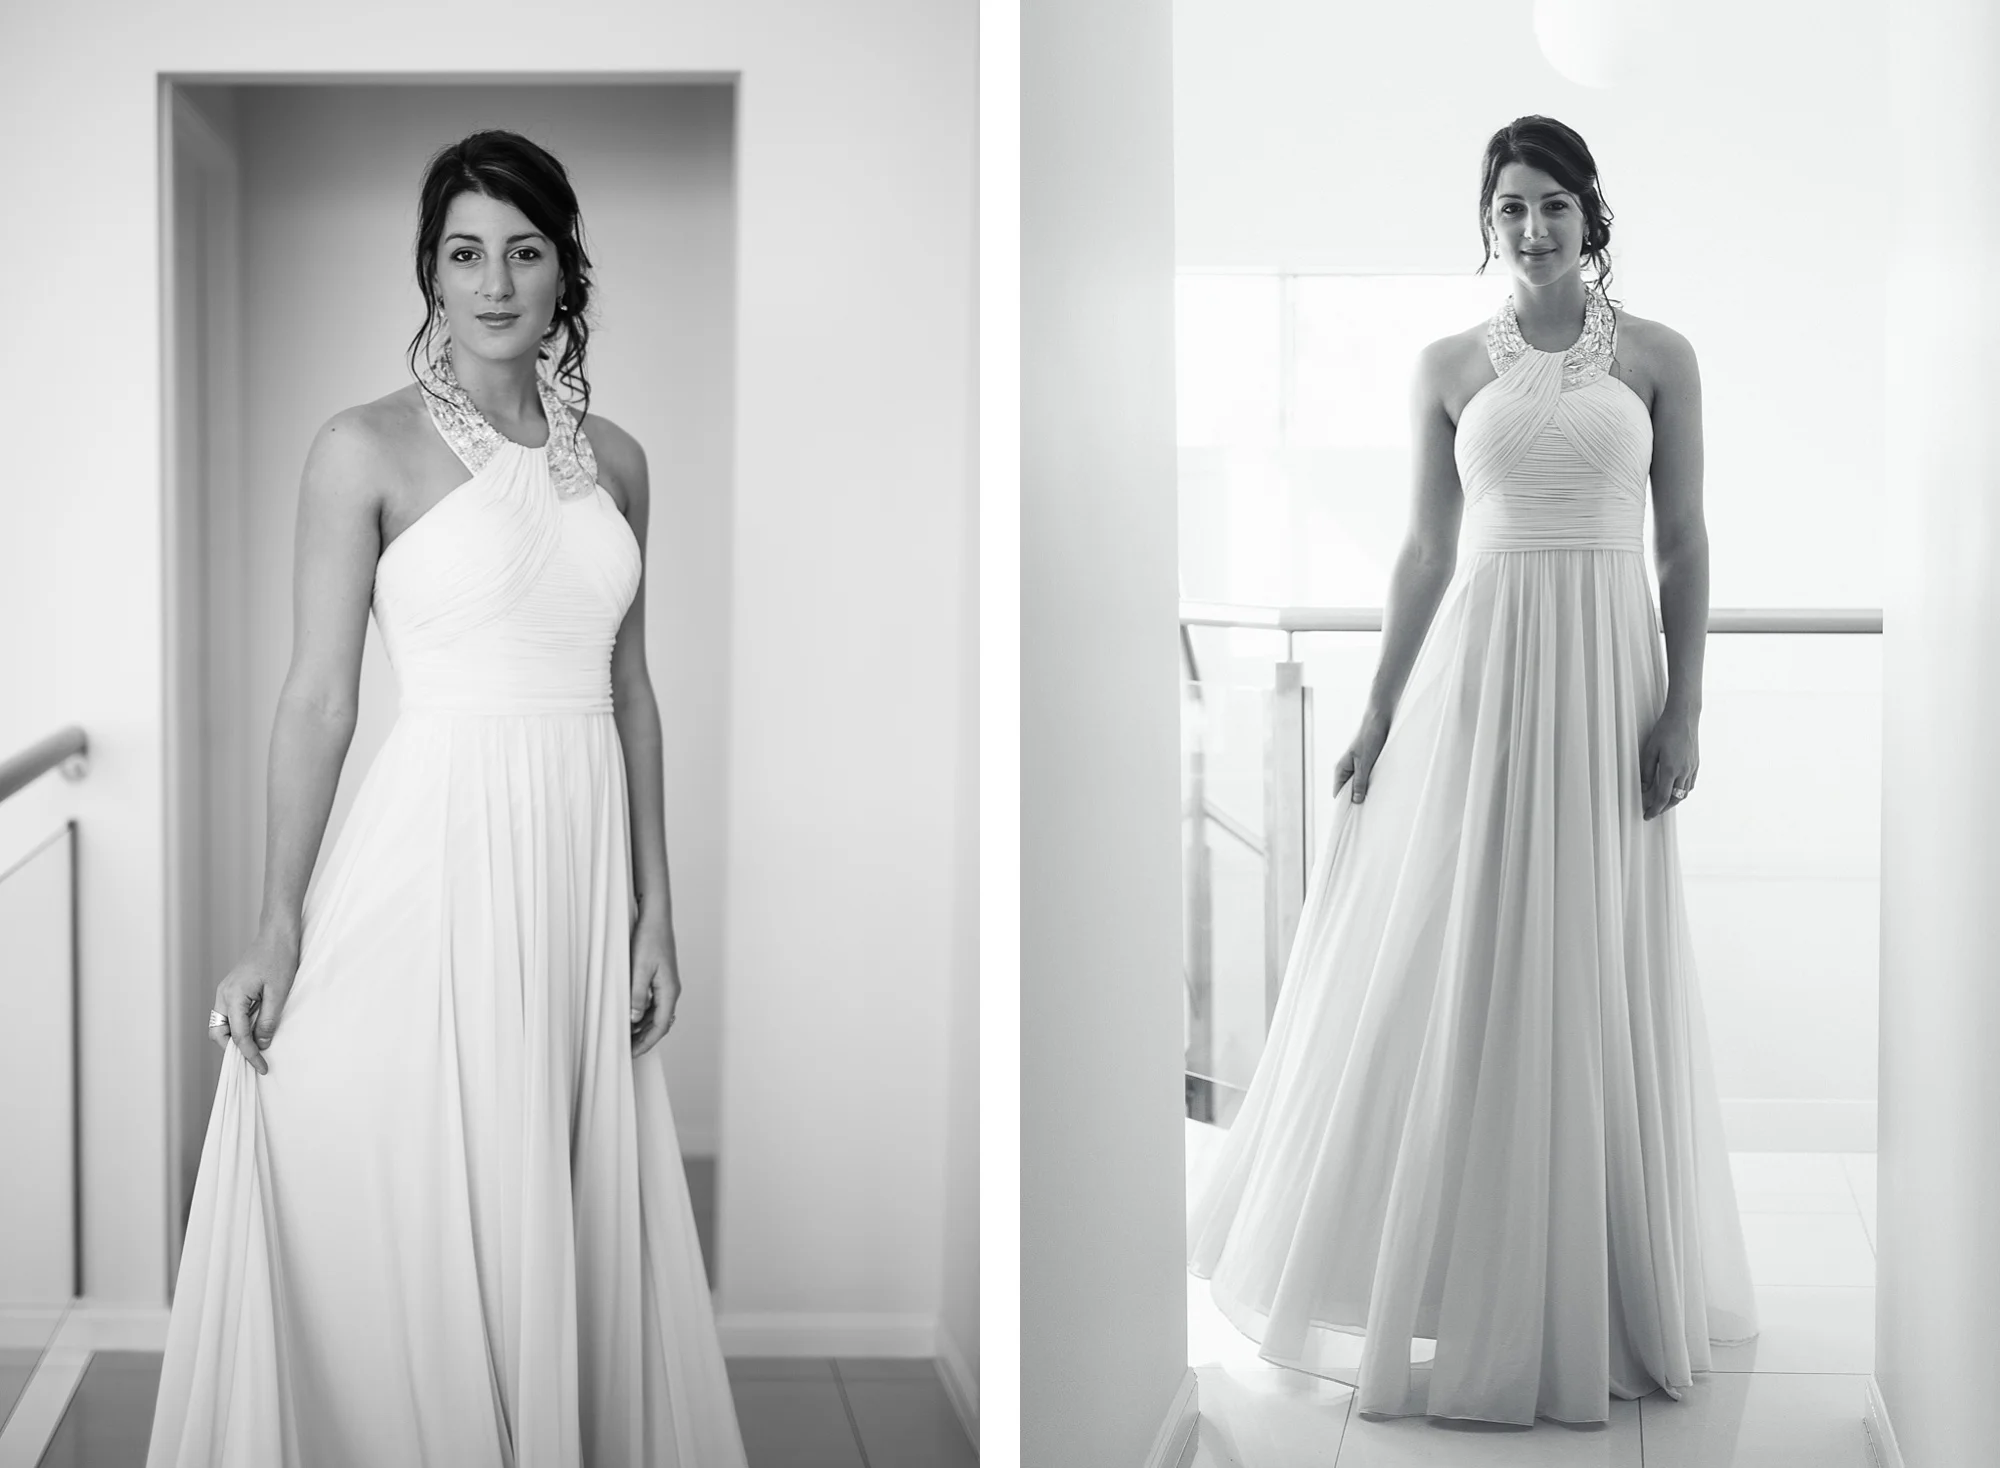
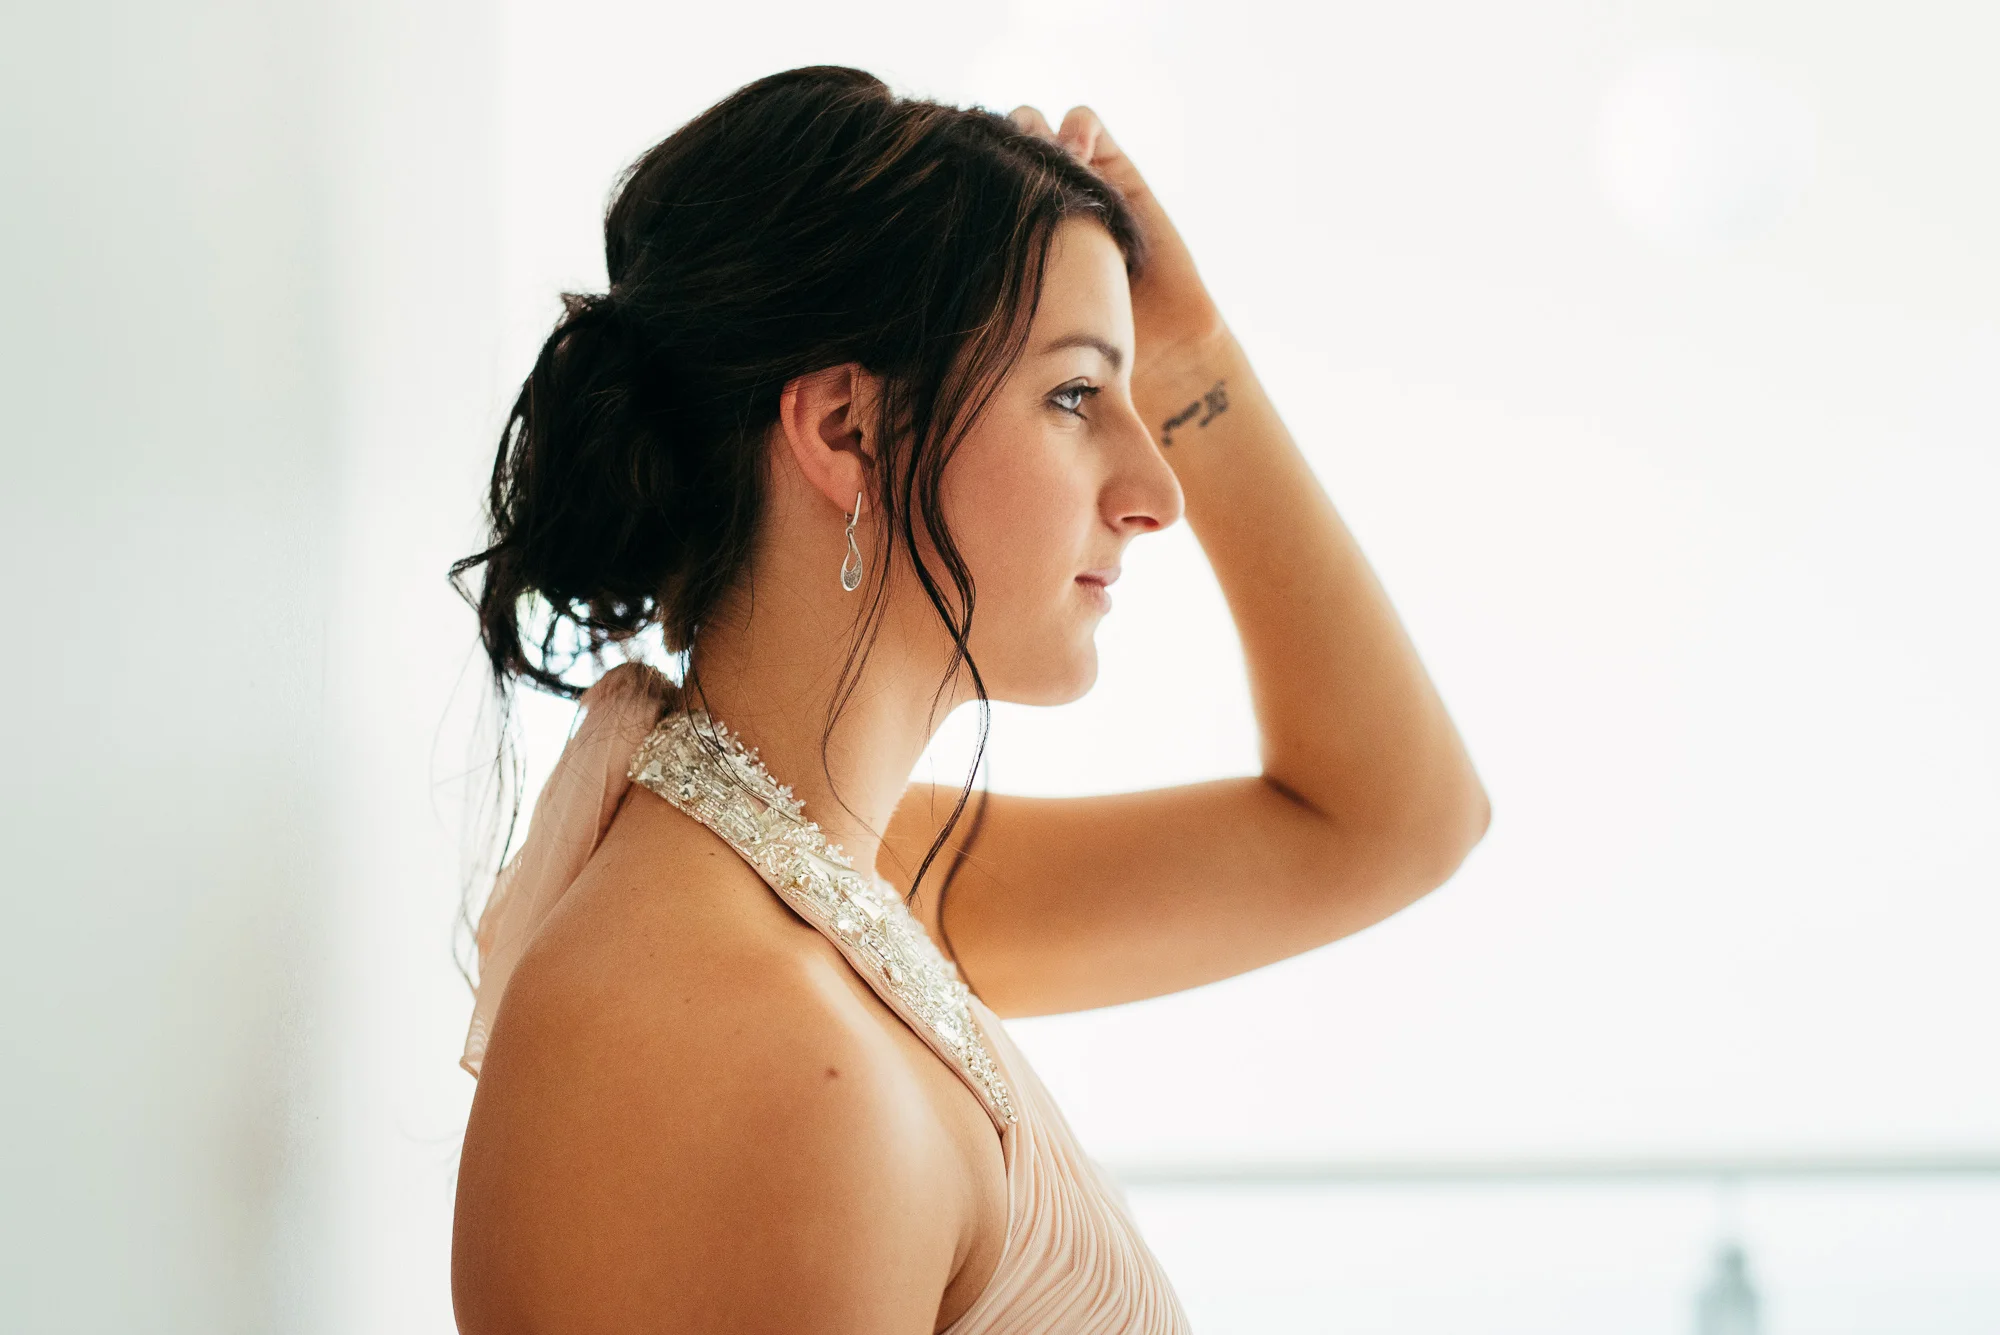
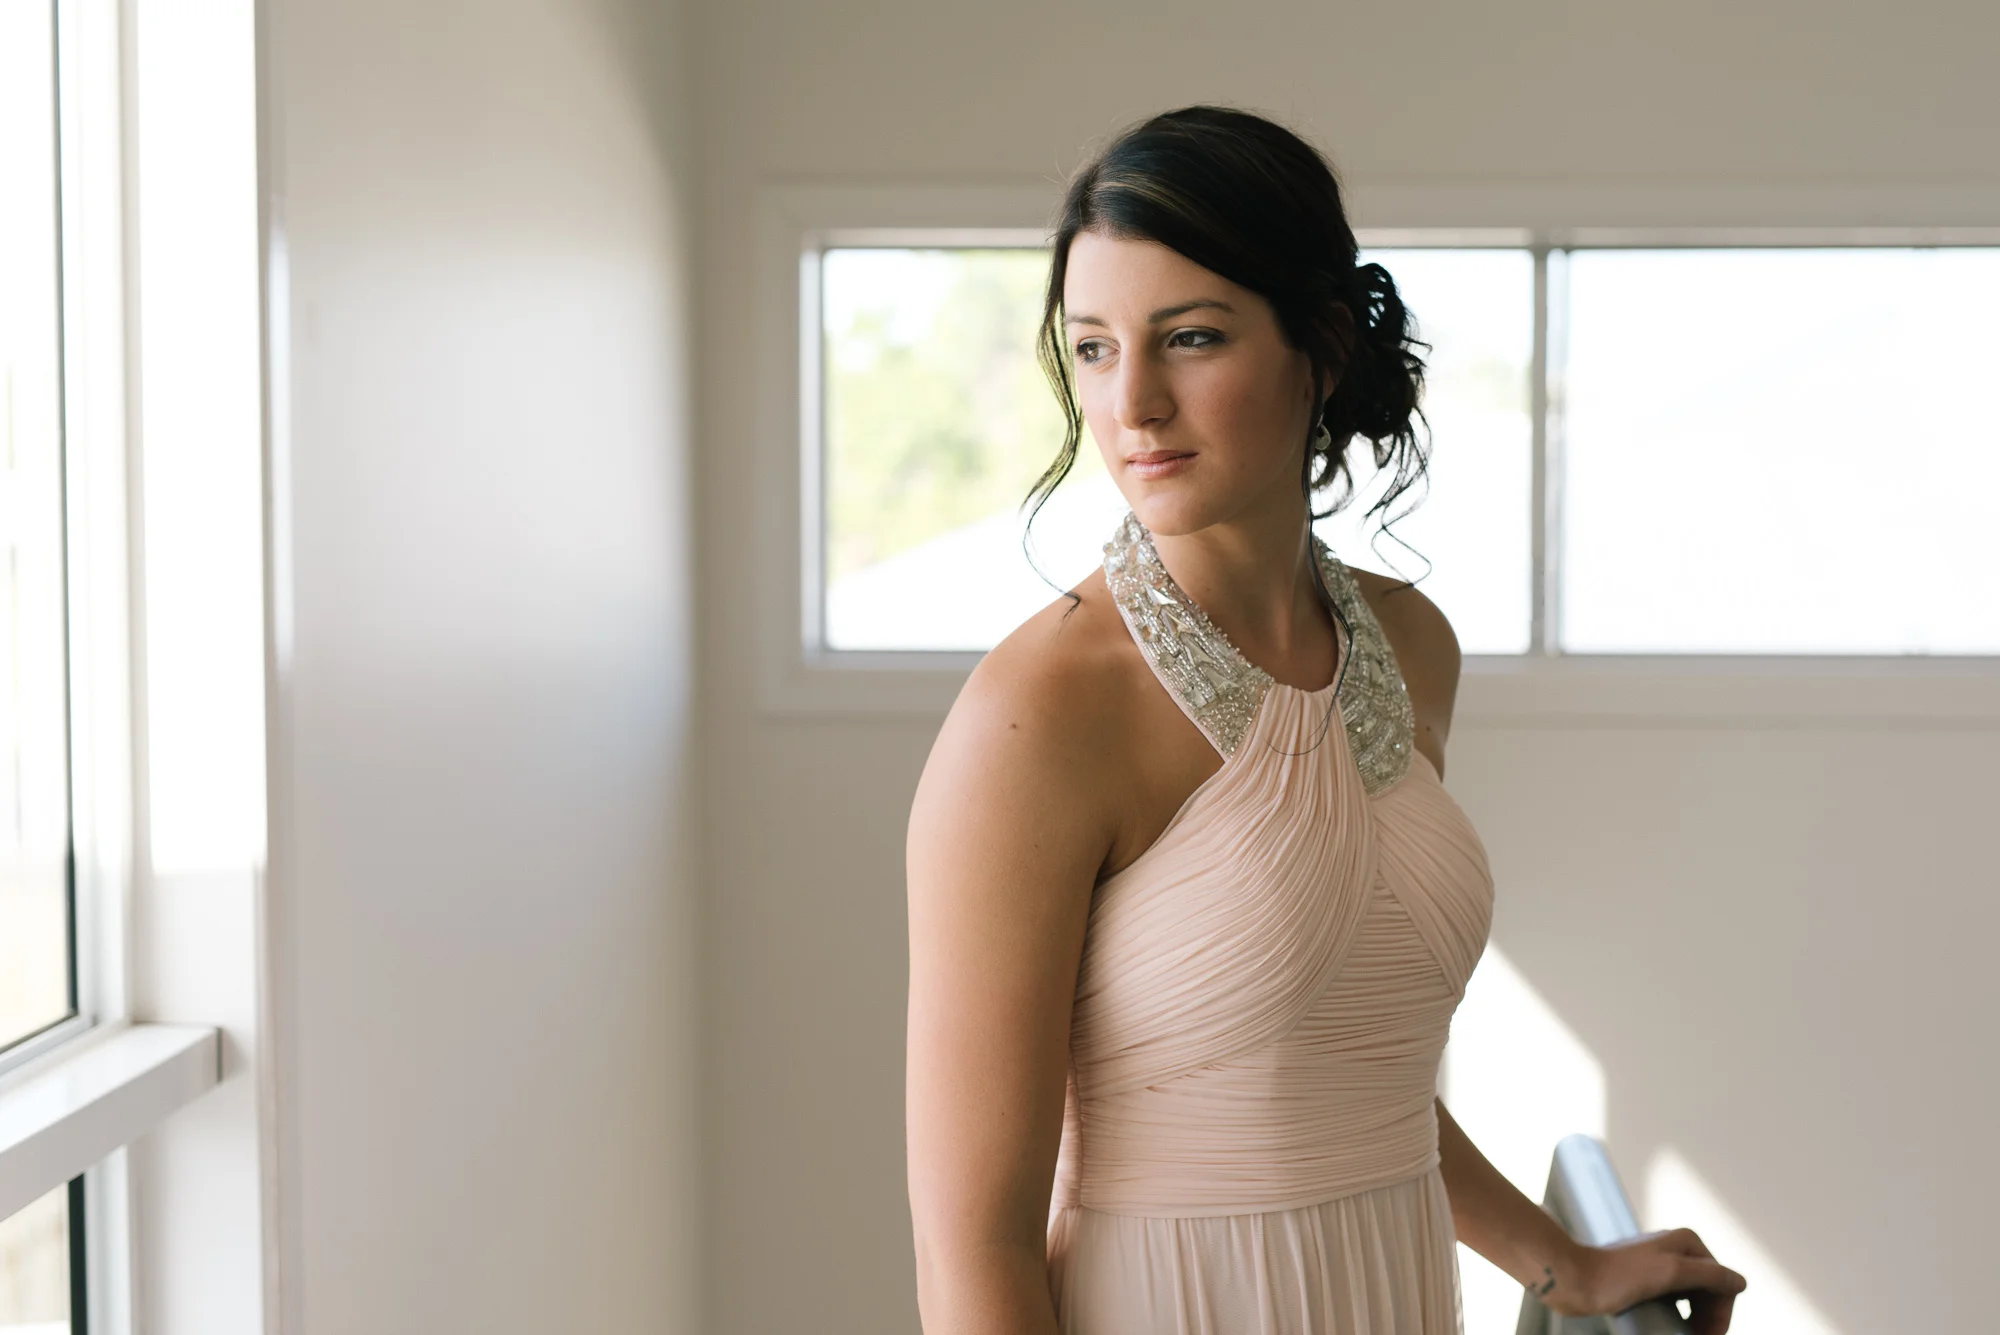
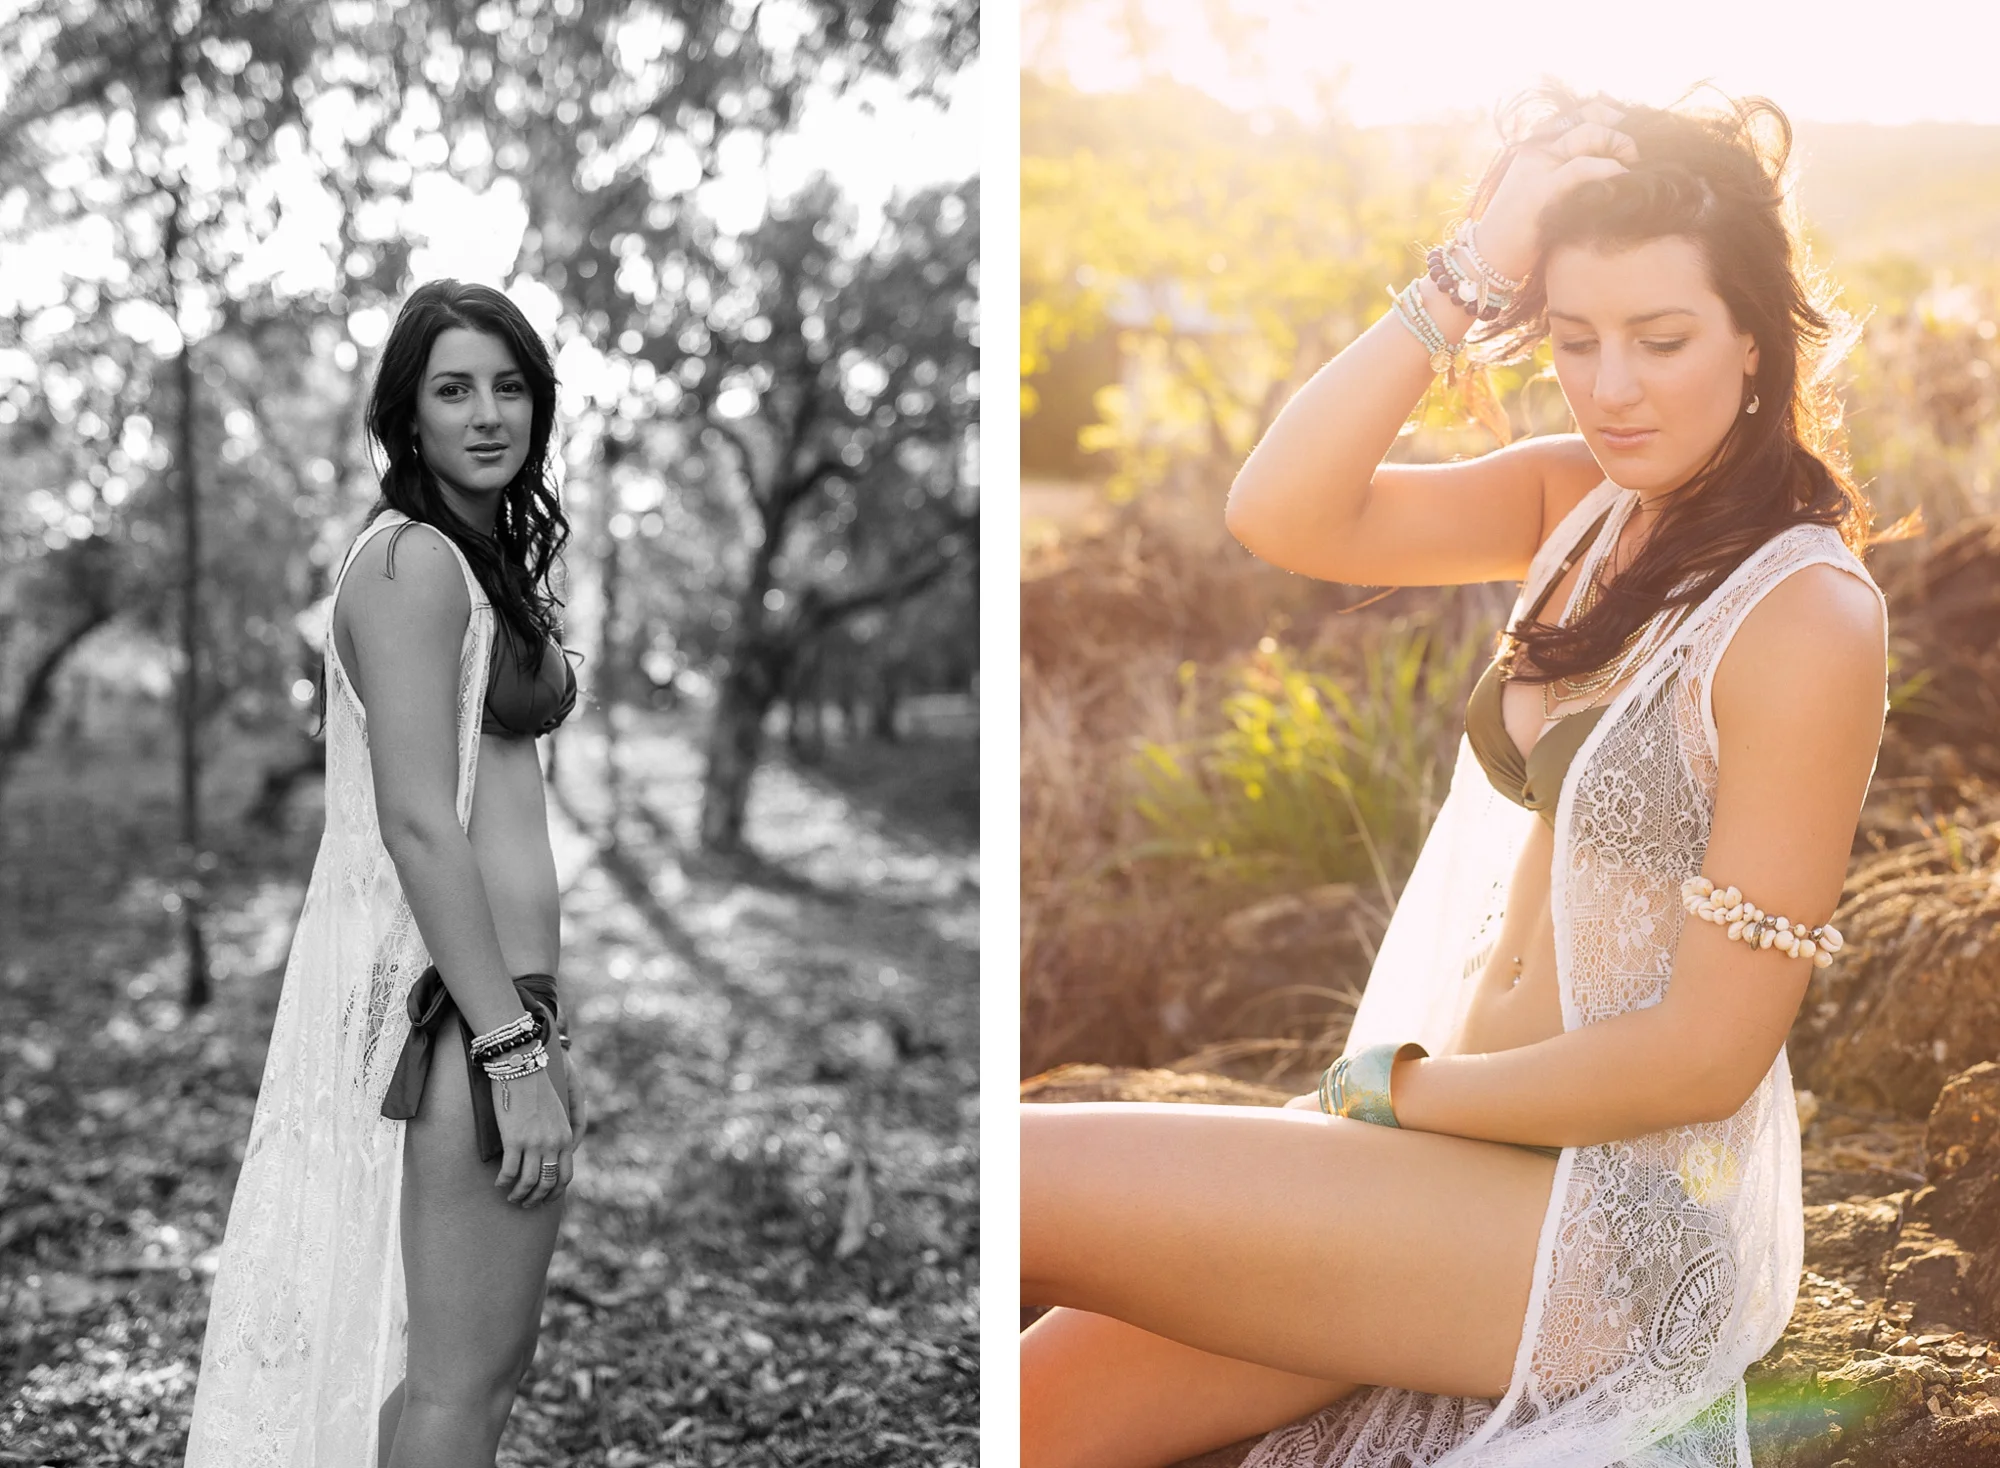
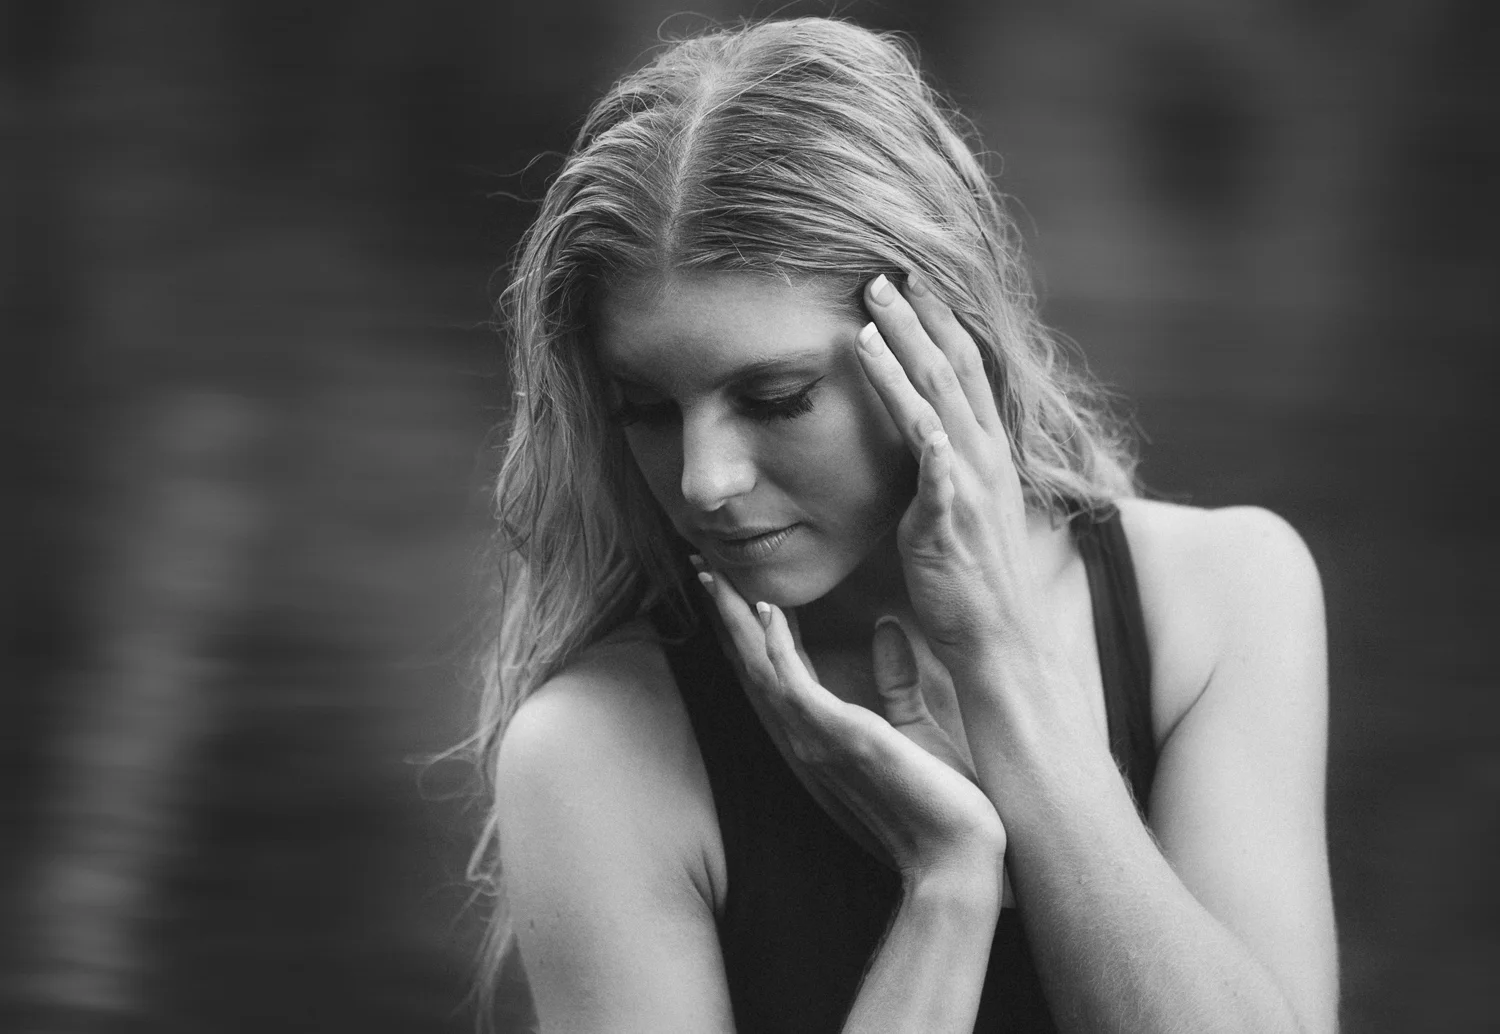
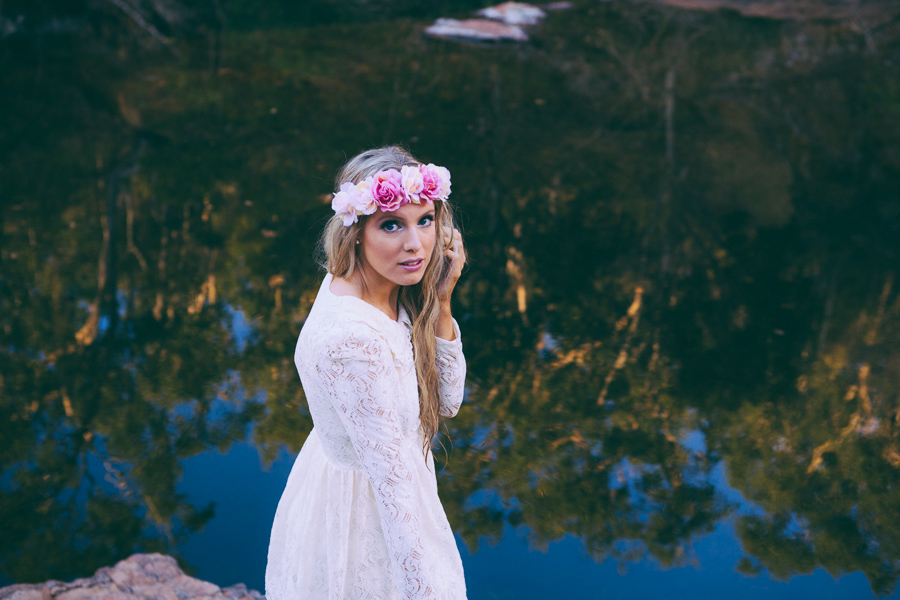
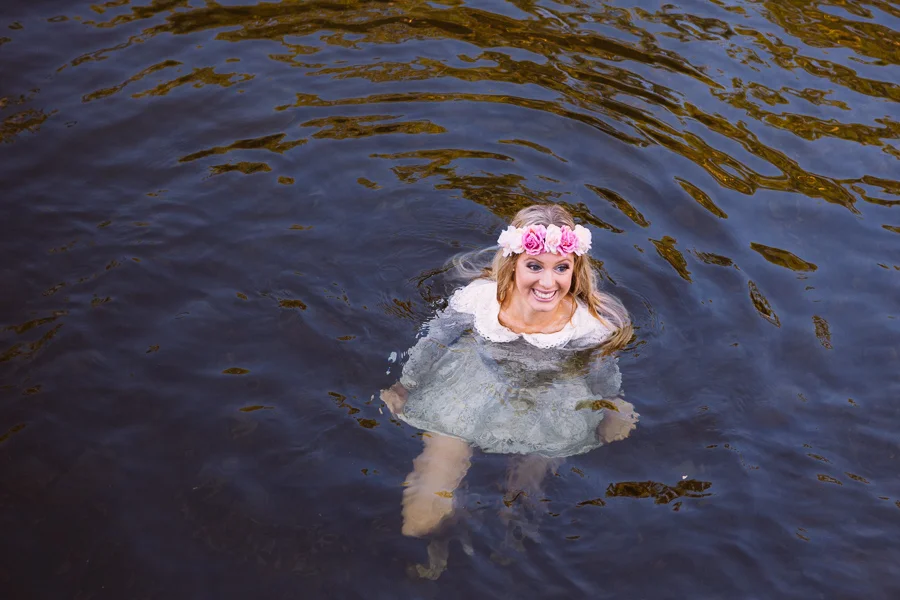
Shannon dropped by to have some portraits done and I took the opportunity to use a technique that I've been wanting to try for a while.

One of the usual limitations of working with studio lights is that sometimes they are a bit overpowering - as in there is a lot of light there, even on the lowest power setting. This means that we're typically working at quite narrow apertures - f7-f11 or so. Downside is that the depth of field is huge at those settings, so everything is in focus and you lose that smooth blur or 'bokeh' that gives portraits the dreamy look we love.

Just push up your shutter speed to 1/2000 sec or higher you might say? Unfortunately - for most cameras - strobes can only work (i.e. 'sync' with the strobe) at shutter speeds of lower than 1/250th sec. Our ISO is already down to 50, so we have no way of further limiting the light. Or do we....

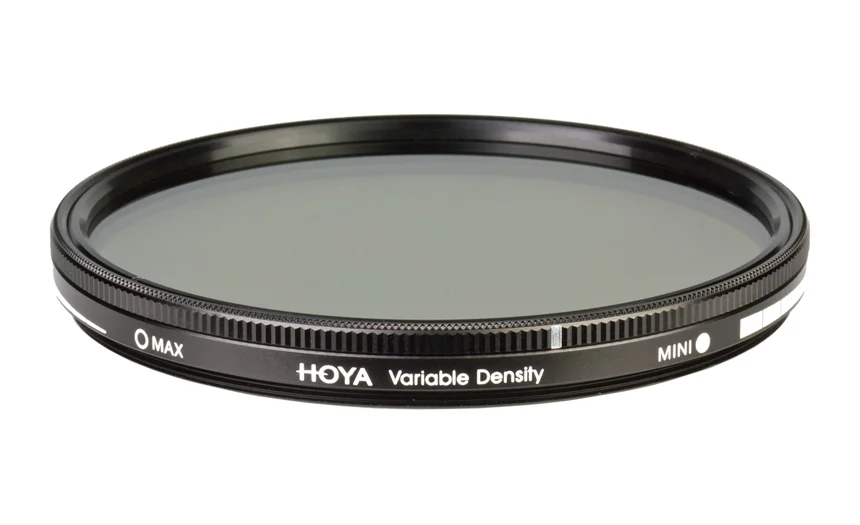
A neutral density filter screws onto the front of the lens and essentially blocks out light in a controlled way. An ND2 filter will allow only half the light through, ND4 one quarter, etc. The high quality filters will block all colours of light equally with high optical accuracy, so no colour shifts or unwanted loss of sharpness.

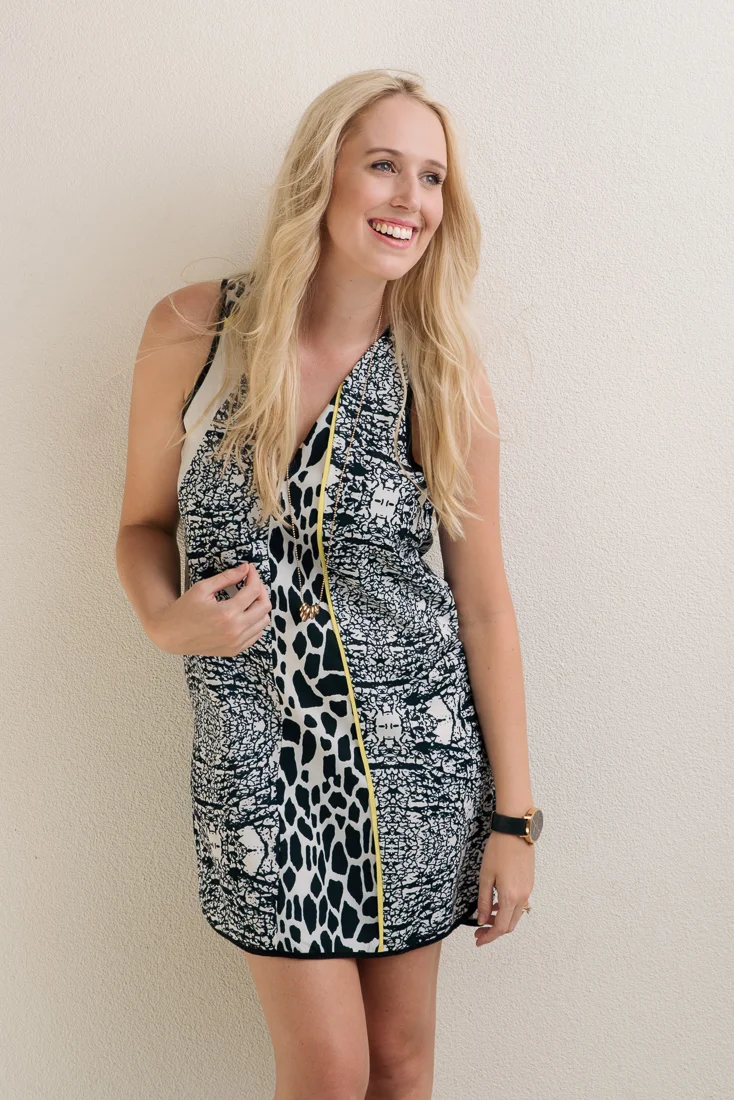
A while back I bought a Hoya 3-400 Variable Density filter. As the name suggests, you can vary the density by twisting the end of the filter. Using the filter in the studio meant that I could drop my aperture from f8 down to f2.8 giving the result above.

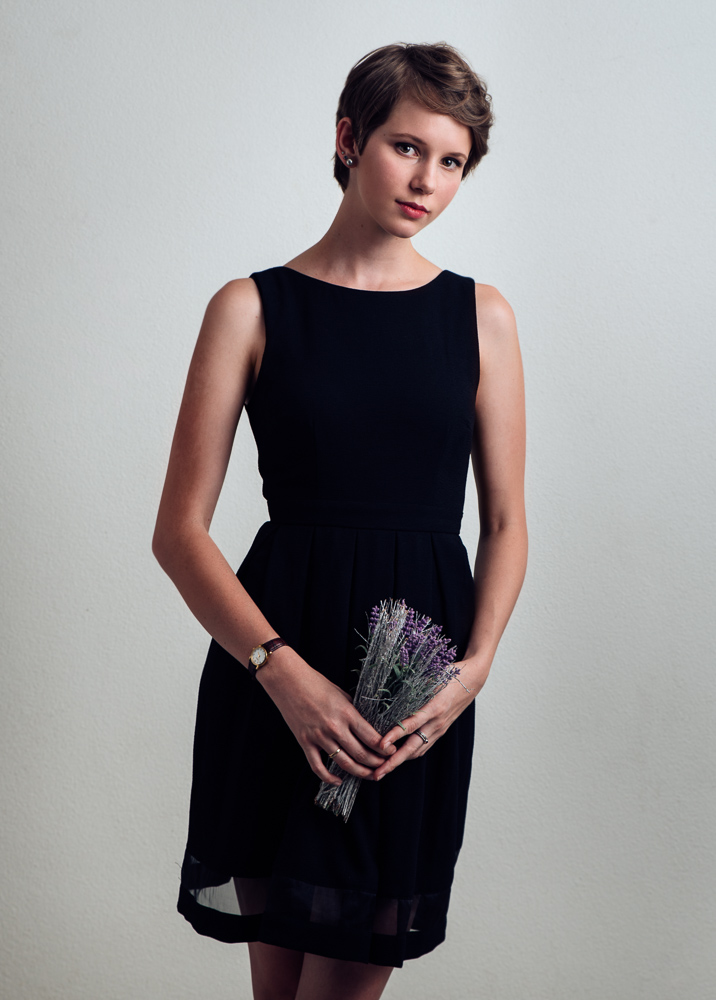
It's going to take a bit of practice to use it, because at such shallow depth of field, the subject's eyes have to be on the same plane of distance from the camera to keep both in focus. On the other hand, you do want some of your subject to be in front and some behind of the in focus area to emphasise that effect. Sometimes I'll accept the eye farther away from the camera being a bit soft, but it's a balance. Just the same as it is using wide apertures in natural light. The same ND filter can be used outside of the studio when trying to balance flash and ambient light and maintain a shallow depth of field.

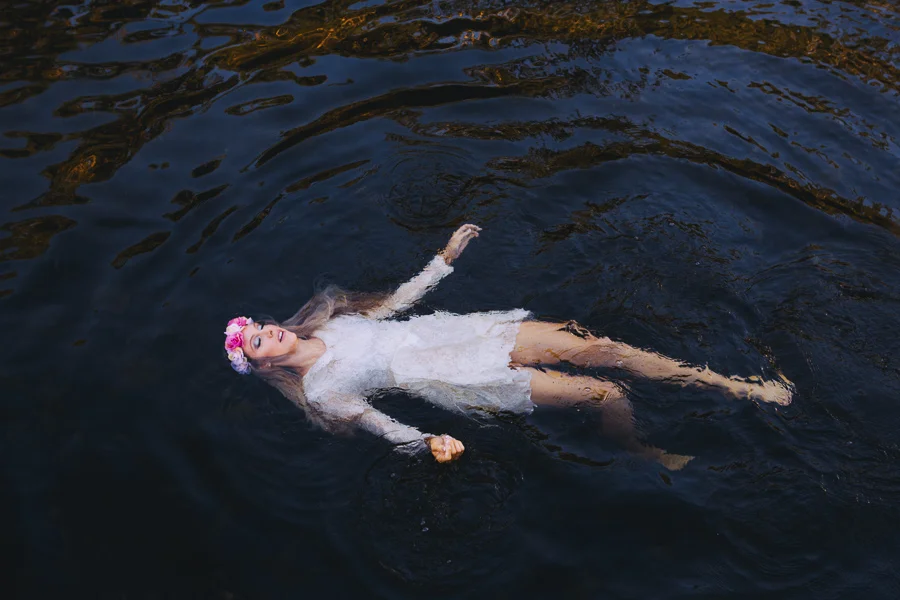
A different use of the ND filter altogether is when photographing landscapes with  moving water. The ND will allow you to use very long shutter speeds (on a tripod of course) to get the soft, blurry 'candy floss' effect that the moving water leaves on a long exposure, whilst the environment is pin sharp.

The shallow depth of field in Shannon's portrait isn't that impressive but it's definitely better than at f8 for sure. Remember, the other two factors that determine depth of field are focal length of the lens and distance from photographer to subject. So to further emphasise I could have used a longer lens (this was at the 60mm length of my 24-70mm) and moved closer to the subject. Note that I also moved her away from the background to further ensure it would be out of focus. One final practical point is that if your studio isn't well lit, you might find it challenging to focus on your subject with the ND attached - it can be very dark through the viewfinder!

As a side note, moving her away from the background when using single flash source is a technique to change the background from white to grey. If you have enough room, a white background can be made to appear anything from pure white to black depending on how you light your subject.

Anna

Anna moved away a while ago, but came visiting the other weekend. We caught up for a quick shoot since it had been a couple of years. Numbers 2 and 4 natural light, the rest an Elinchrom Ranger fired through a Lastolite Mega Umbrella. Camera: Nikon D750. Lenses: Tamron 24-70 f2.8 Di VC with the strobe and Sigma 50mm f1.4 Art for the natural light.

DSC_5519.jpg
Danny TuckerComment
Storm

I did some photos for Storm's portfolio this week. Although she's yet to hit her teen years, she's a bit of a photographer too and uses a Canon 5D. These here are her Mum Sarah's selects from our shoot.

Danny TuckerComment
Hannah

Portfolio portrait shoot with Hannah. Impossible to take a photo without a smile! Get in touch if you would like some unique images captured.

Nikon D750 Tamron SP 24-70mm f/2.8 Di VC @65mm f6.3 1/200 ISO 280. Elinchrom BRX 500, Lastolite parabolic umbrella

Nikon D750 Tamron SP 24-70mm f/2.8 Di VC @65mm f6.3 1/200 ISO 280. Elinchrom BRX 500, Lastolite parabolic umbrella

Danny TuckerportraitsComment
Lola

Little Lola is an Italian greyhound.

Nikon D750 Tamron SP 24-70mm f/2.8 Di VC @60mm f2.8 1/200 ISO 2000

Nikon D750 Tamron SP 24-70mm f/2.8 Di VC @60mm f2.8 1/200 ISO 2000

Danny TuckerComment
Vincent Peters: The light between us

Vincent Peters is a German photographer, a modern day wanderer who we are told in the introduction failed at every school he attended, but became a self-taught master of his craft of portrait and fashion photography after moving to New York in the 1990's.

I bought his 2014 book 'The light between us'. It is 33x30cm in size, hardback, 208 pages with 150 colour & duotone images and beautifully crafted, oozing quality. The images are simply stunning which is no surprise since teNeues is a trusted publisher of high quality photography books.

On the publisher's website the book is listed at US$125 plus shipping or, if there are any remaining, you can select one of the 150 print run collectors' edition which includes a presentation box and duo tone print for a mere US$2800. I bought mine through Bookworld for $AU125 including shipping and it took about 4 weeks to get here.

Peters has included a range of subjects in this beautiful collection, including many well known actors and music artists. The style is a mixture of storytelling with a true sense of serene authenticity.

For me the joy of a book such as this is to not only be immersed in the quality of the print and beauty of the portraits, but to study the lighting he has used for each image and, if possible, 'reverse engineer' how he may have achieved the look. In most cases there is a beautiful simplicity in his work, but photographers will marvel at the cinematic style and technical excellence within the covers of this masterpiece.

Highly recommended.

Danny Tucker Comment
Steve McCurry on the journey

"One of the most important lessons I’ve learned is some of the great pictures happen along the journey and not necessarily at your destination. As you’re driving down the road you have to be attuned to what’s happening and you have to be looking and searching for possible things to photograph. You can’t let good situations and good opportunities pass you by, because that in the end may be more interesting than where you were going.

One of the best ways I’ve always worked is to literally walk outside the hotel door and explore and wander and get a sense of the mood on the street and just try and get lost in that moment. And then suddenly sort of a magical thing happens where you start seeing pictures, you relax, you’re observant, you’re almost in a meditative state. That’s when the good pictures come - it’s all serendipitous, its’ all chance encounters, it’s not planned, you’re just open and you’re not trying to force the situation, you just letting it wash over you. And then from that being open, wonderful things will develop from that mood.

If it’s good and you’ve found a good situation, you need to stay with it. It’s more about the journey than the destination. Good pictures are often few and far between. Great pictures don’t grow on trees. If you recognise something great, don’t let it slip away…go for it immediately."

Danny TuckerComment
Portrait shoot

A few of the pictures I did for Tynneal to include in her RFT portfolio late last year. Get in touch if you would like to find out about having a shoot and how we can make some unique images, whether for work, fun or to share and keep forever.

PC020086-Edit.jpg
shootDanny TuckerComment
How to win friends and influence people

The principles of this age-old book are still as relevant as ever. Excellent rules for life. 

 BECOME A FRIENDLIER PERSON
1. Don't criticise, condemn or complain.
2. Give honest, sincere appreciation.
3. Arouse in the other person an eager want.
4. Become genuinely interested in other people.
5. Smile.
6. Remember that a person's name is to that person the most important sound in any language.
7. Be a good listener. Encourage others to talk about themselves.
8. Talk in terms of the other person's interest.
9. Make the other person feel important - and do so sincerely.
10 The only way to get the best of an argument is to avoid it.

WIN PEOPLE TO YOUR WAY OF THINKING
11. Show respect for the other person's opinions. Never say, 'You're wrong'
12. If you are wrong, admit it quickly and emphatically.
13. Begin in a friendly way.
14. Get the other person saying, 'Yes, yes' immediately.
15. Let the other person do a great deal of the talking.
16. Let the other person feel that the idea is his or hers.
17. Try honestly to see things from the other person's point of view.
18. Be sympathetic with the other person's ideas and desires.
19. Appeal to the nobler motives.
20. Dramatise your ideas.

BE A LEADER
21. Throw down a challenge.
22. Begin with praise and honest appreciation.
23. Call attention to people's mistakes indirectly.
24. Talk about your own mistakes before criticising the other person.
25. Ask questions instead of giving direct orders.
26. Let the other person save face.
27. Praise the slightest and every improvement. Be 'lavish in your praise.'
28. Give the other person a fine reputation to live up to.
29. Use encouragement. Make the fault seem easy to correct.
30. Make the other person happy about doing the thing you suggest.

None of that is obsolete. And it's not about being fake - be genuine in your relationships with others. 

Claire and Jaymie's little girl
Claire and Jaymie's lovely daughter was born today. Small but perfectly formed, she arrived 5 weeks early, and has no name as yet goes by the beautiful name of Hannah! Congratulations guys :)
image.jpg
image.jpg
image.jpg

I don't normally post the all the gory pics, but Claire insisted that I post a picture of her placenta - the reason we delivered her little one so early. The huge vein here was running in front of her cervix on the inside. If she broke her waters, the vein might have torn and baby would die from severe haemorrhage.

Timing of delivery was a fine balance between baby being mature enough to not run into other problems, but not waiting so long that labour might start or her waters break. 

image.jpg

All photos on iPhone 6, edited in VSCO

Danny TuckerComment
The Godfather

Mick is my Godfather and is reading the 1949 'A Portland Vase' by Sarah Pearce, given to him by his father.

Olympus OM-D E-M1, Olympus 12-40 f2.8 @f4.0 1/60 ISO 800

Olympus OM-D E-M1, Olympus 12-40 f2.8 @f4.0 1/60 ISO 800

During the trip Isaac decided that the challenge of a dip in the sea in the middle of a British winter would be a good idea... brave, crazy boy!

Danny TuckerComment
Bokeh love: Sigma 50mm f1.4 Art
Nikon D750 ISO 160 1/500 f2.5

Nikon D750 ISO 160 1/500 f2.5

Photographers love bokeh. It's that special way a lens renders the out of focus area of an image. We use shallow depth of field to bring attention to one part of our work and to dissolve distraction away from the viewers gaze. The word bokeh comes from the Japanese word ボケ which should be read as bo-ke. It translates as blurhaze, however, in the right context can also be used as mental hazecrazinesssenility

A few of my first images using the Sigma 50mm f1.4 Art lens. It's the only lens I have that fits the Nikon and I'm going to keep it that way for a while to really get to know it well.

Nikon D750 ISO 220 1/125 f2.5

Nikon D750 ISO 220 1/125 f2.5

Nikon D750 ISO 160 1/400 f2.5

Nikon D750 ISO 160 1/400 f2.5

Nikon D750 ISO 160 1/500 f1.4  Image by Suki Ahluwalia

Nikon D750 ISO 160 1/500 f1.4  Image by Suki Ahluwalia

Nikon D750 ISO 160 1/640 f2.5

Nikon D750 ISO 160 1/640 f2.5

Nikon D750 ISO 160 1/500 f2.2

Nikon D750 ISO 160 1/500 f2.2

Danny TuckerComment
Storehouse app for iPhone & iPad

Storehouse is the type of app I like - it has a very low effort to result ratio, that's to say it is simple to use and does it's job with beautiful simplicity, in both function and design.

In short Storehouse is an app for the iOS system that lets you tell visual stories using images, video and text. The company recently won an Apple design award and it's clear why when you see how quickly and easily it can help you to tell the stories of your everyday life and passion. It started on the iPad at the beginning of the year and was released for iPhone a couple of weeks ago.

You create a new story by importing a series of your images and/or video. Then you rearrange the media by using drag/drop and simple resizing tools. As you resize an image, the surrounding ones flip into a layout that makes them all look great together. You can easily adjust the crop and add in text in one of 3 formats: quote, headline or normal.

Other features include:

  • Smooth flow scrolling through stories
  • Tap an image to view it full-screen, then tap again to return to story
  • From within the app, share your individual stories via Facebook, email, Twitter or text message
  • Copy web URL to a story
  • Stories open in a mobile browser with same elegant layout
  • Social connections, with the ability to 'like', reshare and comment on stories

The social aspect of Storehouse allows you to connect with other users and view their stories as they publish them. Stories can be searched by category, free text or #hashtag. You can sign up via Facebook, as with many apps, giving you the immediacy of potential connections, but it doesn't post to your profile unless you tell it to.

Disadvantages and future potential could include:

  • Although there is a draft mode for saving a story in progress, you can't publish 'private' stories with a share link
  • The web version of a story links directly to your profile and all your other stories
  • There aren't many options for adjusting spacing between text or size of text, but this is largely the key to the app's simplicity and producing a consistent, clutter-free layout
  • It's free

I find free apps a bit of a risk, particularly if I really like them. If there is no clear path to monetisation, then I worry that they may not be around for the long haul. Sure Stonehouse has generated millions of dollars in investment so far, but where next? What could a 'premium' version add? Or will in-app ads follow?

I had a coffee yesterday morning, took a few images and put together a quick story, which I managed to publish before finishing my drink. It is genuinely easy to throw images together on the move and add some quick text. This included dropping all my images through VSCO Cam before uploading them.

Anyway for now, enjoy that it's free and a great way to quickly share visual stories of your life.

My Storehouse username is dannytucker 

Danny TuckerComment
Kristi at Alligator Creek

Portfolio shoot for Kristiaan. She was delighted to learn that the only alligators were in the name, but the water temperature was a bit on the cool side, even for North Queensland. Hair & make up by Gemma Appleby.

Canon 5D3 70-200 f2.8L @175mm f3.5 1/640 ISO 1250

Canon 5D3 70-200 f2.8L @175mm f3.5 1/640 ISO 1250

Canon 5D3 70-200 f2.8L @200mm f4.0 1/640 ISO 1250

Canon 5D3 70-200 f2.8L @200mm f4.0 1/640 ISO 1250

Canon 5D3 70-200 f2.8L @75mm f4.0 1/800 ISO 1250

Canon 5D3 70-200 f2.8L @75mm f4.0 1/800 ISO 1250

Canon 5D3 24-70 f2.8L @52mm f4.0 1/800 ISO 1250

Canon 5D3 24-70 f2.8L @52mm f4.0 1/800 ISO 1250

Canon 5D3 24-70 f2.8L @42mm f4.0 1/800 ISO 1250

Canon 5D3 24-70 f2.8L @42mm f4.0 1/800 ISO 1250

Canon 5D3 70-200L f2.8L @135mm f4.0 1/500 ISO 800

Canon 5D3 70-200L f2.8L @135mm f4.0 1/500 ISO 800

Canon 5D3 70-200L f2.8 @70mm f2.8 1/1600 ISO 1250

Canon 5D3 70-200L f2.8 @70mm f2.8 1/1600 ISO 1250

Canon 5D3 24-70 f2.8L @50mm f3.5 1/800 ISO 1250

Canon 5D3 24-70 f2.8L @50mm f3.5 1/800 ISO 1250

I kinda forgot to mention the eels though...

Editing a portrait in Adobe Lightroom

A couple of videos showing how I might approach a 15 minute portrait edit using only Adobe Lightroom. Image was supplied by Trish Love-Lapico. I don't usually use Lightroom for a lot of detail editing - i.e. skin and other pixel-level edits, which are more efficiently done in Photoshop. It is helpful however to see what Lightroom can offer. Shout if you have any questions.

Initial colour correction and edit

Finishing touches